
![]()
With the explosive growth of audiobooks, podcasts, video voiceover, narration, and other categories, more people are recording on their own than ever before. Helping voiceover artists record clear, intelligible, and professional voiceover tracks is a sizeable part of our business as it’s an area where our products provide tremendous help. This article will discuss some of our favorite strategies to overcome the most common problems voiceover artists encounter in order to produce better-sounding voiceover tracks.
Voiceover tracks are at their best when there are no audible distractions. The voice should be clear, free of background noise, with an audible focus to them that is impossible to achieve in a small, untreated room. These characteristics are the backdrop for what matters most: an effective, engaging, and emotion-conveying performance.
Equipment Matters Less Than You Think
Note that I haven’t talked much about equipment or microphones yet. That’s because there are so many great microphones out there, for me it almost doesn’t matter much which mic you use. They will all sound different, and chances are, you already have an opinion about what works best for you. Some people prefer a large diaphragm condenser mic (there are so many here to choose from), others like dynamic mics such as the Shure SM7B, or the Heil PR40.
I’m less interested in the model number of the mic you are using than I am in its audio characteristics. Most voiceover microphones, for instance, have a cardioid pickup pattern. Cardioid mics picks up best directly in front of it, somewhat less on the sides (how much less depends on the polar response of each mic, as well as how far to the side the sound source is), with quite a lot of rejection from behind the microphone. Figure-8 mics (many ribbon mics are figure-8) reject the sides, but pick up equally well in the front and back. Both of these types of mics exhibit proximity effect, which means that as the source gets closer to the microphone element, not only does it gets louder overall (as one would expect) but the bass energy also gets louder faster (relative to the treble). Proximity effect can be used to great effect to produce the “voice of god” radio announcer sort of tone, with enhanced low end that is also sometimes boosted even more with EQ.
This produces a set of questions: which microphone, with which polar response, should I use? How close should I be to the microphone? How should I set up my voiceover station in my room? What acoustic treatments do I need to get professional sound quality? The answer to these questions will depend, in part, upon what problems there are in the room that need to be solved. So let’s take a look at these most common problems for voiceover artists.
External noise isolation
Without question, isolation from external noise factors is one of the biggest obstacles to professional voiceover tracks. All it takes is a dog barking, loud traffic going by, or a phone ringing at the wrong moment to ruin a take. Furthermore, background drone noises like a computer CPU, heater or AC vent, or other household appliances (refrigerators and freezers, in particular, seem to make a lot of noise) will corrupt your tracks with a blanket of noise. Sometimes the noise is objectionable in the raw tracks, but they are usually even more so once compression (which often raises the noise floor) and EQ (high frequencies, where the noise lives, are often boosted in vocal EQ treatments) are applied in post production or during mixdown.
Remove noise at the source
The first step in dealing with noise is to reduce or remove it at the source. Turn off the noisy HVAC or appliance while tracking. If it’s your computer’s CPU making the noise, look into a quieter computer, or upgrade the cooling system of your computer to a quieter one. If, however, the noise source in the room cannot be deactivated (ie, it is the recording computer or hard drive), then we still have options. First is to take advantage of the polar pattern of our microphone. Remember that? Most microphones are cardioid, with a lot of rejection to the rear of the mic. We can take advantage of that; simply aim the null of the mic toward the sound source. It’s best to place the mic by hand, while listening with headphones. You will likely hear the noise go up or down in volume as you move the mic (be careful bumping a live microphone with enough gain on it to hear low-level background noise, your ears will thank you). This alone can often give a quite noticeable noise floor reduction.
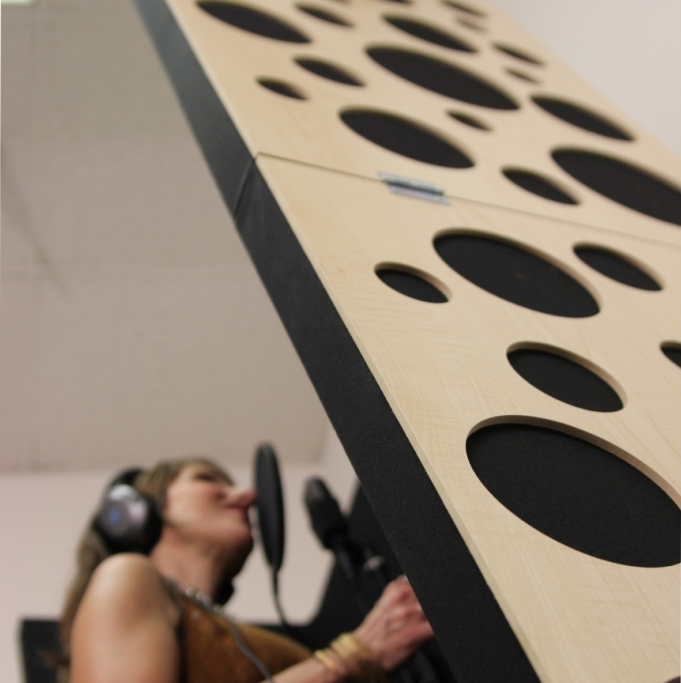
Get close!
Next, if you are recording in a noisier environment, getting up tight to the microphone, with your mouth very close to the diaphragm, will make the sound of the voice much louder than anything in the background. It won’t eliminate background noise, of course, but it will allow you to reduce the gain on the mic preamp, which can also lower the noise floor significantly. However, close miking a voice has its perils that we may want to address, if we have no choice but to record this way. We might want to reduce the low end with EQ, because of the enhanced bass from the proximity effect. And, we will probably want to both invest in a good pop filter, since plosives are much easier to create up close to the mic, and also learn good mic technique to avoid them. Plosives are caused when puffs of air strike the mic diaphragm, causing it to “jump” away from the voice, creating a very loud pop that sticks out like a sore thumb (and can damage PA loudspeakers). They usually come when voicing a “p” or “b” sound, but any phoneme that produces a puff of air can cause them. Try holding the palm of your hand just in front of your lips while talking, and you will feel the little puffs of air your mouth generates. Really skilled VO artists can reduce proximity effect by turning their head slightly while voicing a plosive, to “aim” the puff of air away from the mic diaphragm. In very close proximity, this technique may change the tonality of the voice too much to be useful, but it often helps a lot if the talent is comfortable with the technique.
You’ll notice that I have yet to address using acoustic panels; all of the above can be done as a matter of course with the equipment you are already using. Good engineering goes a very long way, but the best engineers also know that good acoustics makes great engineering much easier.
Acoustic Treatment Strategies
With these engineering techniques in mind, let’s turn to the various acoustic treatment strategies available to us to take our voiceover recordings to the next level. Treatment strategies for a voiceover studio are not unlike treatment strategies for other rooms. Broadband bass traps in the corners will tend to even out the entire frequency spectrum, and using absorption at early reflection points (relative to the talent’s position and the microphone, as opposed to the monitor speakers and the listener’s ear) greatly improve intelligibility and articulation. Other products such as diffusors can then be employed to balance out the decay time and tonality of the room, yielding a much more natural sound that gives more possibilities with less work during mixdown and postproduction. Let’s take a look at some of the options available to us.
Dedicated room
The best case scenario is, of course, a dedicated voiceover studio built from the ground up to both isolate from external noise and sound great. I do not consider tiny, closet-sized makeshift “vocal booths” in this category (see below), but rather larger rooms, with good soundproofing technology (increased mass, decoupling, and airtightness) combined with a solid acoustic treatment strategy. If you are lucky enough to be working in a room like this, then you probably don’t need to read this article, but the benefits are many. A room like this gives is much more flexibility in terms of mic technique. The engineer can pull the mic back away from the talent’s mouth, which can give a much more natural sound in a well-treated room, without the sound becoming too echo-ey or phase-y as happens in untreated rooms. It also reduces or eliminates excessive proximity effect, sibilance, and plosives.
Bigger is better
Next would be a large room with acoustic treatment. Usually these are just normal rooms in a house, but that have been acoustically treated to sound good. These can give sounds just as good as above, though noise concerns will be more. If you leave near a busy road, an airport, or a set of traintracks then you may have to learn to work around noisy schedules. But, if you live in a more rural area, this can be ideal.
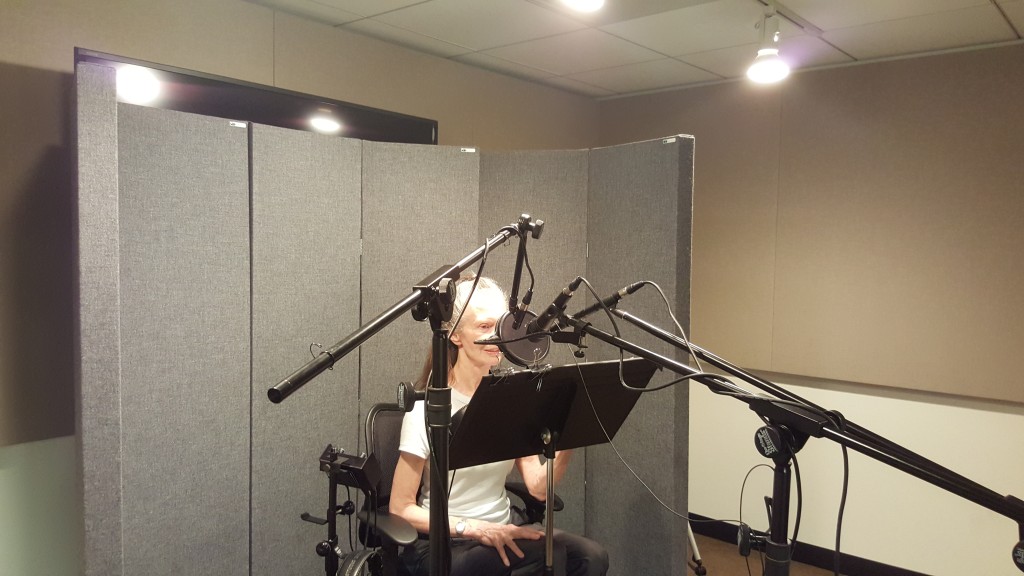
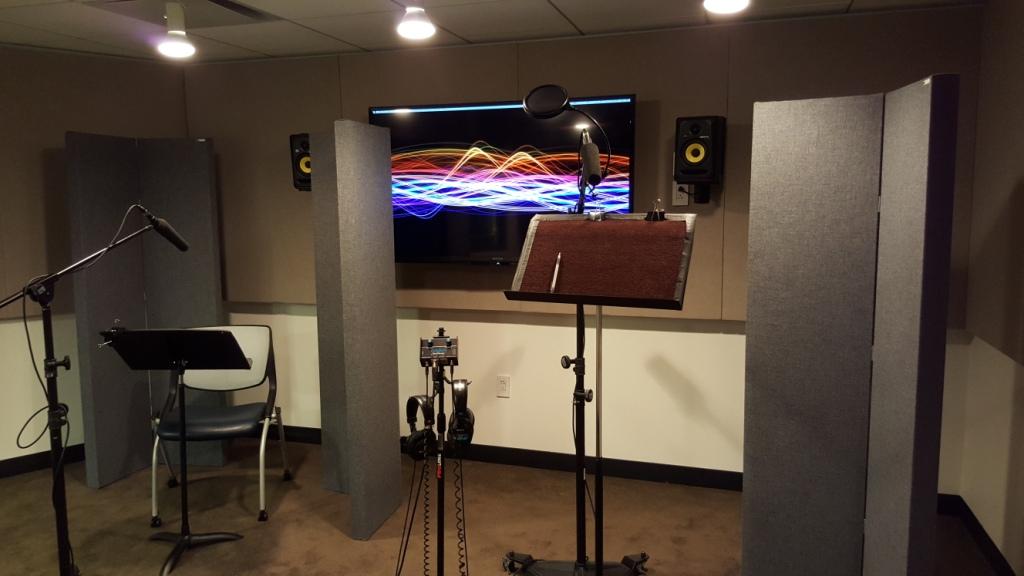
Portable panels
 Even if you do have some noise coming in, you can employ both the engineering techniques listed above, as well as some portable acoustic panels placed near the talent and the microphone. A product like the Portable Isolation Booth, or even a few panels with stands placed in a V-shape behind the microphone, will not only cut down the background noise by a few precious dB, but will also reduce the amount of the ambient “room tone” that gets into the recording. These panels, in close proximity like this, will absorb much of the sound of the voice on its way out into the room in the first place, cutting down on the amount of reflections from the source. Plus they will absorb reflections trying to make their way back into the microphone. Panels used in this way – and as always, it’s all about surface area, the more panels you have the better, up to & including completely surrounding the talent with a circle of panels – therefore help on several fronts: it creates less room sound, AND it means less room sound gets into the mic, AND it helps isolate by a few dB. Keep in mind that these devices reduce the room tone in the recording, regardless of whether the room tone is good or bad. So even if you have a well-treated, great sounding room, you can use these devices effectively to adjust the amount of that great room sound that gets into your recordings.
Small rooms can work, too
Next best would be a smaller room with acoustic treatment. Small rooms in general need more bass trapping, and many of the more severe problems in small rooms are at the higher end of the bass range, between 100 and 400Hz, or the octaves where fundamental frequencies are for the widest range of human voices, male and female. Cleaning up this upper bass area is, therefore, paramount. Apart from that, the overall treatment strategies are the same, to the extent that the more limited space permits.
 You can still get fantastic results with portable panels in untreated rooms. A Portable Isolation Booth or two, or several panels on stands, can help out your sound incredibly. The difference they make is more noticeable in an untreated room, where brings the recorded sound into focus by eliminating room tone. The characteristic “room tone” of small, untreated rooms is usually most prevalent in the midrange, from 200-400Hz or so up to 1-2kHz, or sometimes even higher up into the 2-4kHz range, where imbalances sound particularly harsh in part because our ears are most sensitive at these frequencies. Because of the quantity and strength of reflections in these small rooms, there will be a lot of comb filtering and short echoes, which are very difficult to repair in mixing or postproduction.
Untreated rooms also have no bass trapping strategy, so it’s important to make sure that the talent is not standing or sitting in a part of the room that contains a bass peak or null. Have the talent warm up a few times while moving around the room, listening for a place where the low end room resonance seems natural and compliments the talent’s voice tone. Once you find that spot in the room, set up there, and place the portable panels around you as described above. If you have the luxury of doing so, sneaking a panel or two on the ceiling above the talent and the microphone can help quite a bit also.
Stay out of the closet
My least favorite way to record voiceover is in tiny, closet-sized booths. Every once in a while I’ll see someone on a forum talking about building a 4’x4’x8’ booth, and I just cringe inside. Tiny rooms – particularly tiny rooms where 2 dimensions are the same, and the 3rd is an even multiple of the first 2 – are very challenging to get a good voice tone. The room modes, at low frequencies near the fundamentals of the human voice, will be very inconsistent. If vocal booths are built correctly, then they can provide good external isolation, which is the only reason to consider recording in a tiny room in the first place. If you must use one of these booths, then build or buy the largest one you can, get as many bass traps into the room (the ceiling is often a great place), and you can produce good-sounding tracks.
Sound Great, No Matter What Gear You Have
With these techniques of good audio engineering and smart acoustic treatment, you can make excellent voiceover recordings even with modest gear. And when you are ready to invest in higher-end gear, you will know how to get the best out of them, creating voiceover tracks that can compete sonically with anything else out there.
When In Doubt, Ask For Help
As always, we are happy to help you maximize the sonic potential of your room and your recordings with our many years of experience and patented GIK Acoustic treatments. Contact us for free acoustical advice.

GIK Giveaway Viral Video Contest 2024
Room EQ Wizard TUTORIAL
How to set up and use REW In this video we show you how [...]
DIFFUSION Concepts Explained
How Acoustic Diffusers Work And Which One Is Right For You In this video [...]
Jan
The GIK Acoustic Advice
Get Your Room Sound Right For FREE! In this video we are giving a [...]
Jan
Designer Tips: The Significance of “Clouds” with Mike Major
When people reach out to us at GIK for acoustic advice, we never have any [...]
Jun
Designer Tips: The Importance of Coverage Area with James Lindenschmidt
The most important factor in acoustic treatment performance is coverage area. Or more specifically, the [...]
May
Designer Tips: Home Theaters and Acoustic Balance with John Dykstra
Without fail, one of the first things our clients say to us when we begin [...]
May
Summer Giveaway 2021 Vote
The GIK Acoustics Summer Giveaway Photo Contest 2021 invited customers to submit photos illustrating how [...]
Aug